Automation Testing with CI/CD - Playwright Automation Tests with AWS CodeBuild
Integrate Playwright Automation Tests with AWS CodeBuild
In this blogpost, We will integrate playwright automation tests with AWS CodeBuild.

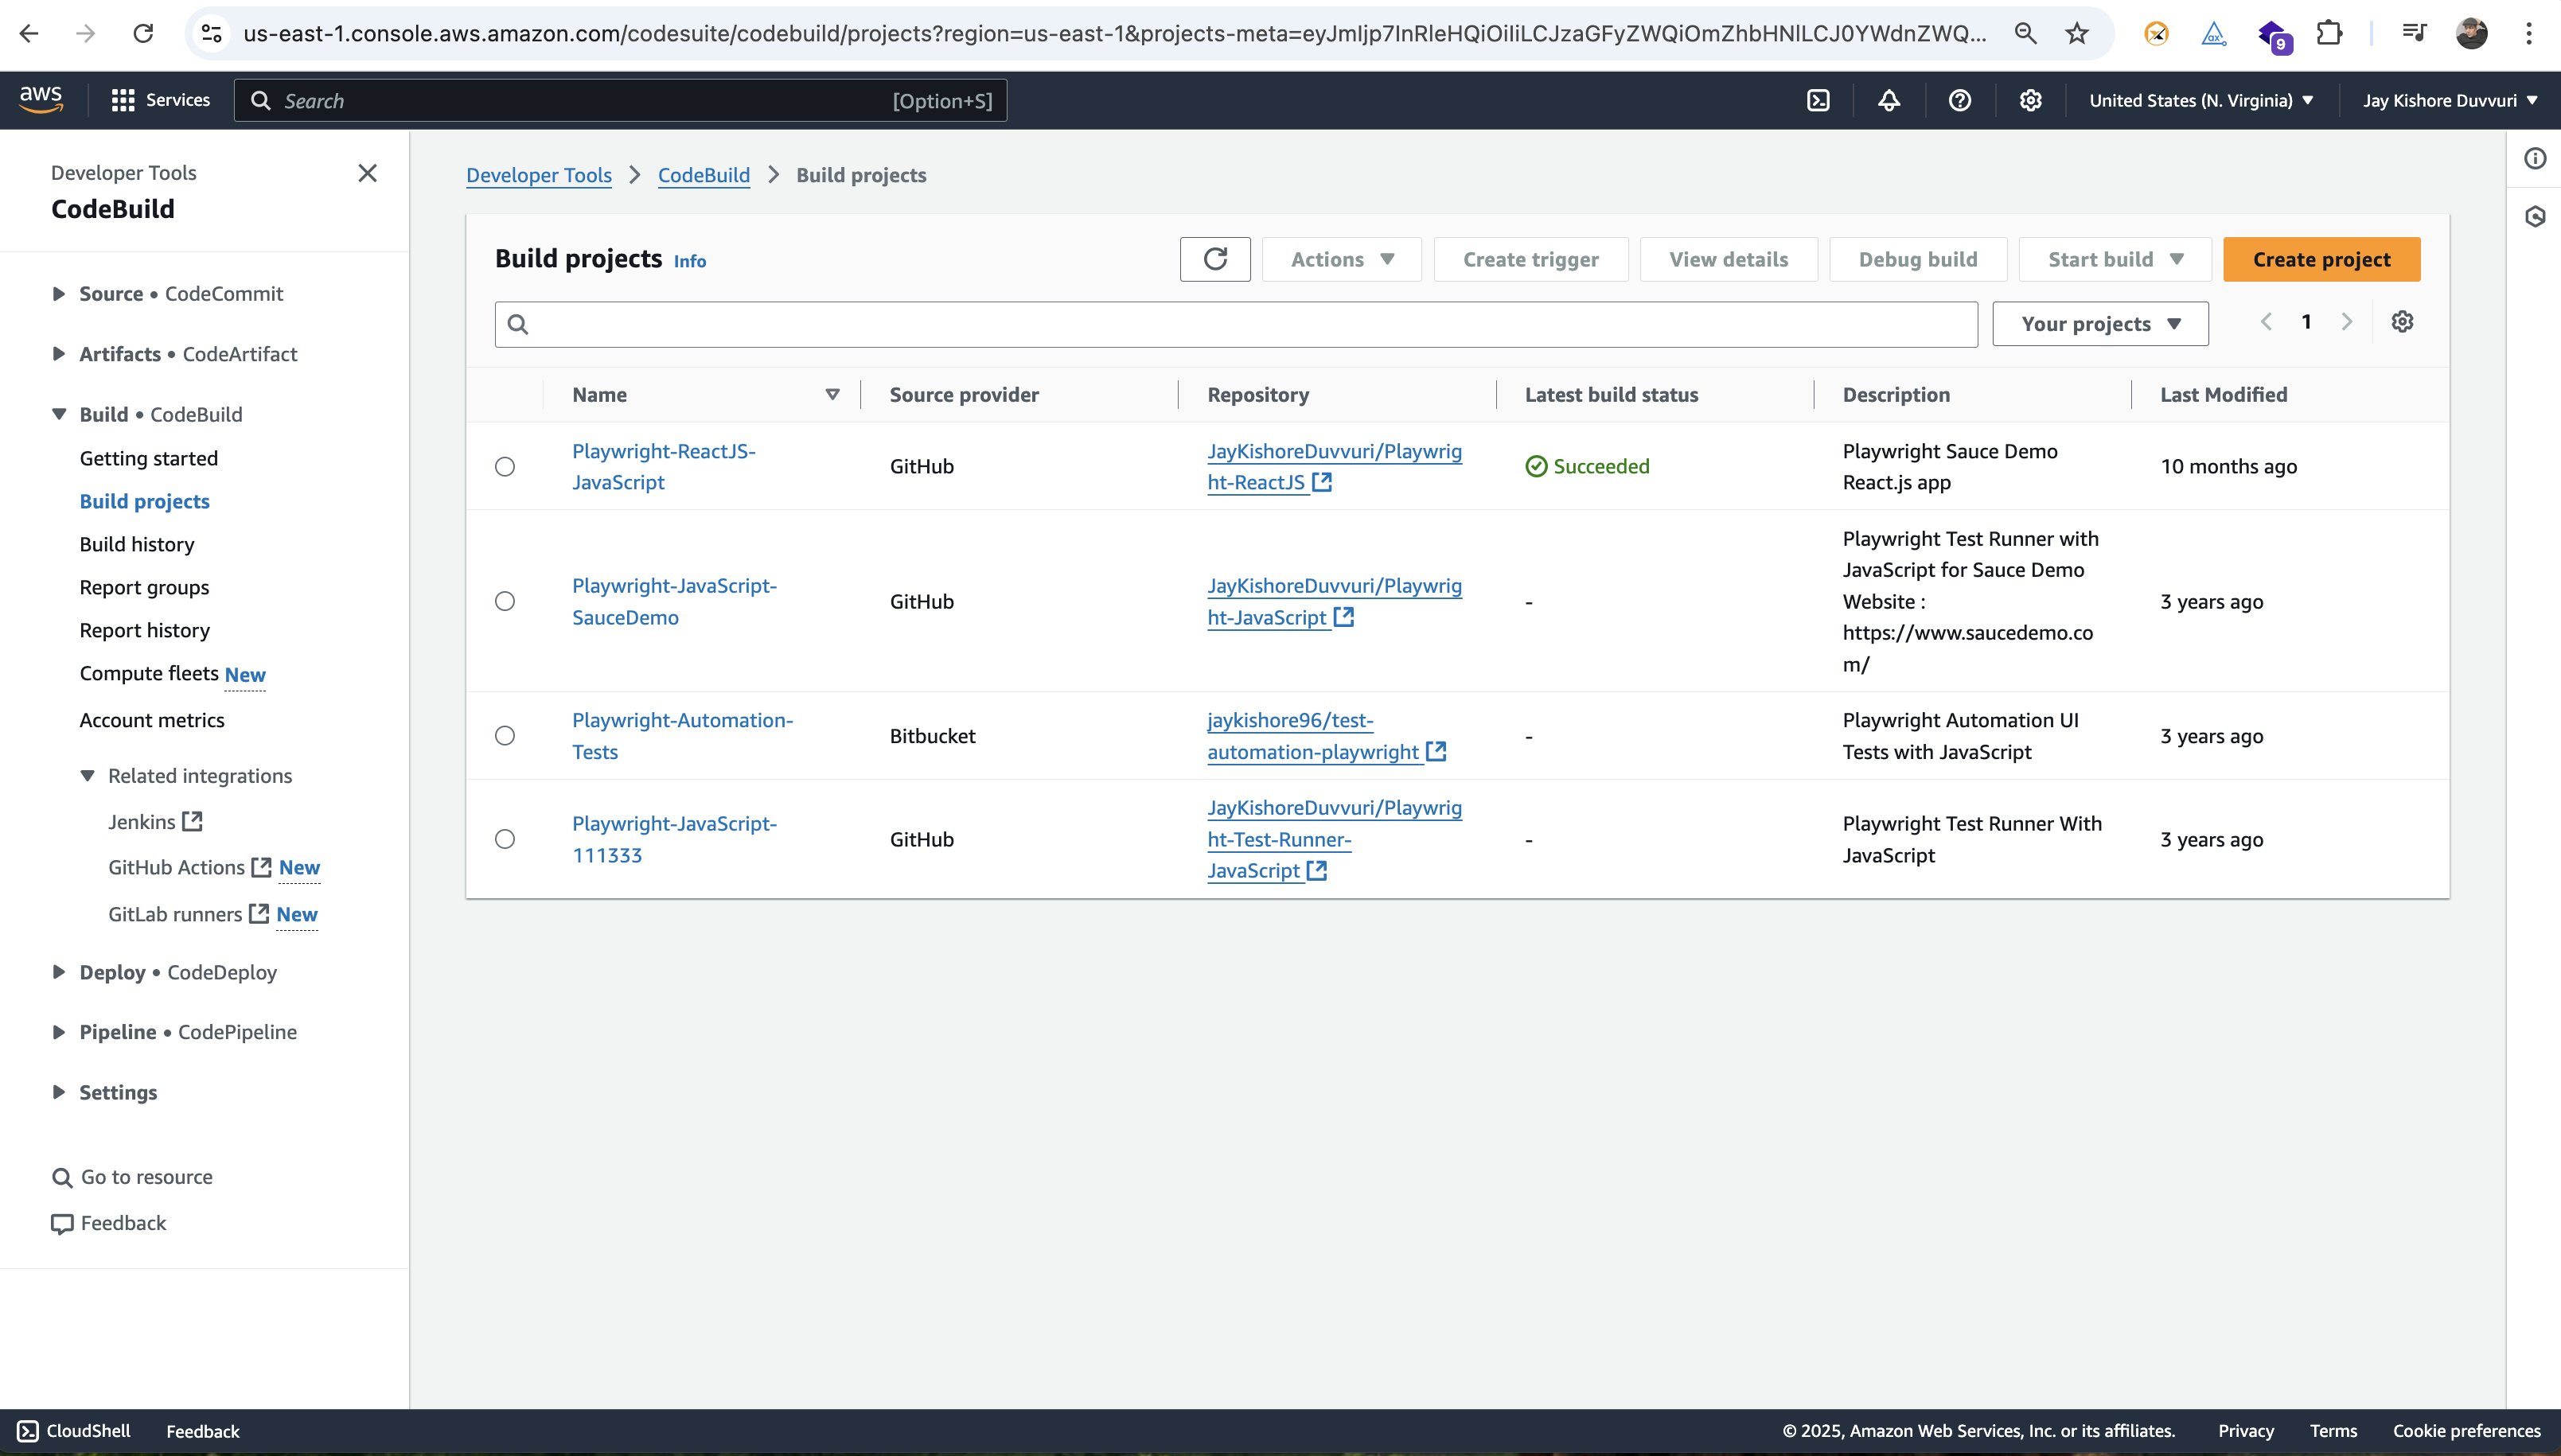
What is AWS CodeBuild?
AWS CodeBuild is a fully managed continuous integration service that compiles source code, runs tests, and produces software packages that are ready to deploy. With CodeBuild, you don’t need to provision, manage, and scale your own build servers.
CodeBuild scales continuously and processes multiple builds concurrently, so your builds are not left waiting in a queue.
You will see a home page like this below

Now, Type "CodeBuild" in your search bar at the top and hit enter!

You will be navigated to CodeBuild section like below
Old (Please do not follow below screenshot)

Now, Click on Create project button

Old (Please do not follow below screenshot)

You will be navigated to Create Build Project page as shown below. For now, select as "Default project" as this option will be anyways selected by default.

Old (Please do not follow below screenshot)

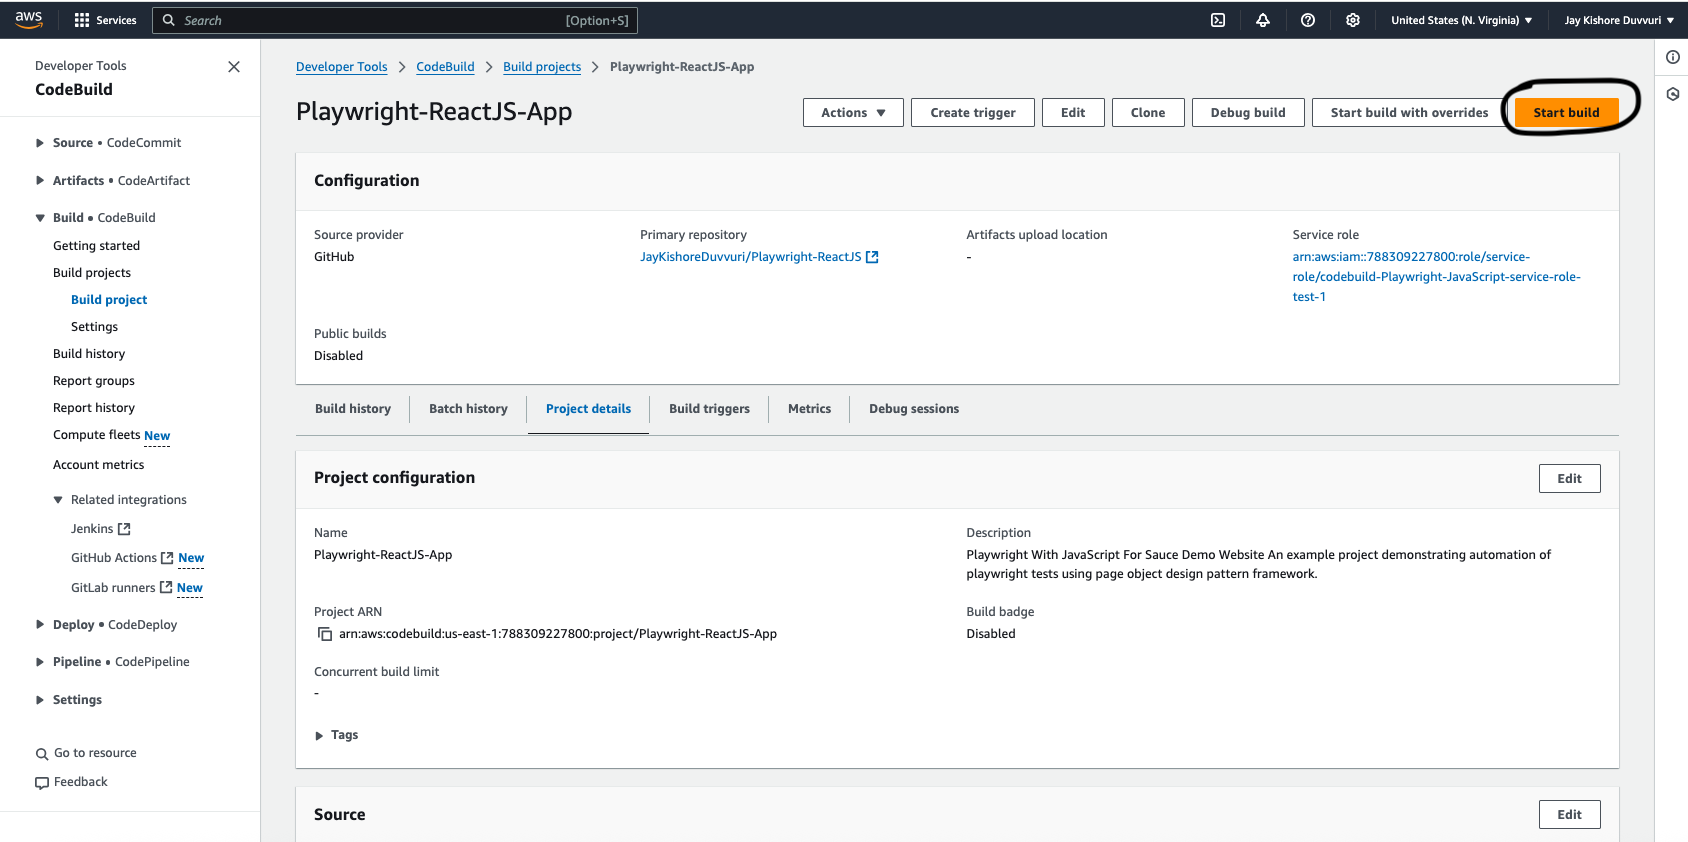
Fill in the Project name and Project Description as shown above and scroll down a bit. I have filled the "project name" as "Playwright-ReactJS-App" to make it unique.
You will see the Source section and Environment section

Now, In the "Source section", in the "Source provider" dropdown as shown below select the option as "GitHub".

The Environment section is changed with the latest AWS Code Build compared to the older one as shown in the below screenshot.
Old (Please do not follow below screenshot)

Here select "GitHub" from the Source provider dropdown give your GitHub Repository here as I'm using public repository here. This will open up a small popup window to authenticate your GitHub Account. Please authenticate your GitHub account.

Select your GitHub Repository here

Old (Please do not follow below screenshot)

Now, scroll down to see your Environment section and here fill in like below:
Environment image: Managed image
Operating system:Ubuntu
Runtime(s): Standard
Image: aws/codebuild/standard:7.0
Environment type: Linux ---> (This feature is removed from the current Environment Section)
Service role: New service role
Role name: codebuild-Playwright-JavaScript-service-role


Old --> Please do not follow below Configurations)
Environment image: Managed image
Operating system:Ubuntu
Runtime(s): Standard
Image: aws/codebuild/standard:5.0
Environment type: Linux ----> (This Feature is missing in the latest Environment section).
Service role: New service role
Role name: codebuild-Playwright-JavaScript-service-role
(Please do not follow below screenshot)

Old (Please do not follow below screenshot)

Make sure "Project name" and "Role name" are available in AWS. I mean make it as a unique name as like no other user had used it earlier.
If the "project name" and "role name" are not unique you will get an error like this below.
I have used the "Role name" as "codebuild-Playwright-JavaScript-service-role-111333" and "Project name" as "Playwright-JavaScript-111333"


Hence, change the Role name to something unique like for example "codebuild-Playwright-JavaScript-service-role-test-1" as shown below:

For Safari:
Now, scroll down to "Buildspec" section in the "Build commands" text box give your commands - "npm install && npx playwright install-deps && npm run test:safari" for example separated by "&&" in between your number of commands.
Now, scroll down to "Buildspec" section in the "Build commands" text box give your commands - "npm install && npx playwright install-deps && npm run test:safari" for example separated by "&&" in between your number of commands.

For Chrome:
in the "Build commands" text box give your commands - "npm install && npx playwright install chrome && npm run test:chrome"


Old (Please do not follow below screenshot)

Create on "Create build project" button like shown above.
You will get a screen as show below as the new build project is created now

So, you see something like this below! Click on the "Start build" button

Click on "Build logs" button

First time, It errored out asking me to run the command "npx playwright install"as shown below

Then, I had to click "Playwright-ReactJS-App" as shown below to go back to the Build History.


Now, Click on "Project Details" option as shown below

Scroll down to reach "Buildspec" section and click on "Edit" button

Add the command "npx playwright install" and click on "Update buildspec" button as shown below


Click on "Start build" button


Now, you see downloading browsers are successful !


Click on the close button here as shown below.

You will be landed to "CodeBuild" home page and see the status as "Succeeded" or "Failed"

You will see the phase details like below when selected "Phase Details" tab

I've created two "build projects" one with Bitbucket as Source provider and others with GitHub as mentioned in this post above.

Publish Test Report:
Go to the Project and click on "Edit" button as shown below

You will land here on Edit Project page.

Scroll down to the "Buildspec" section, it should look like below

Now, Edit your file

Your "Build commands" should look like below:
version: 0.2
phases:
build:
commands:
- npm install && npx playwright install chrome && npm run test:chrome
reports:
test-report:
files:
- "results.xml"
file-format: "JUNITXML"
Click on "Update Project" button at the bottom of the page as shown below

After clicking "Update Project" button, you will com back to "Build Project" page

Here, click on "Start build" button as shown below
Click on "Trail Logs" Button as shown below


Click on Close button and come back to home page. Here, click on the Reports tab as shown below


Select the Report generated and click on it as shown from above.
Voila…..!


Test report generated :) !
Alternatively, from home page, you can click here as shown below to see the report as well.


Repos:
GitHub Repo : GitHub-Repo
GitLab Repo: GitLab-Repo
GitLab Pipelines: GitLab-Pipelines
Finally, you've ran your automation tests using AWS CodeBuild and published test report :)!!!
Happy Automation Testing Guys :) !


🌟 dark web market
ReplyDelete